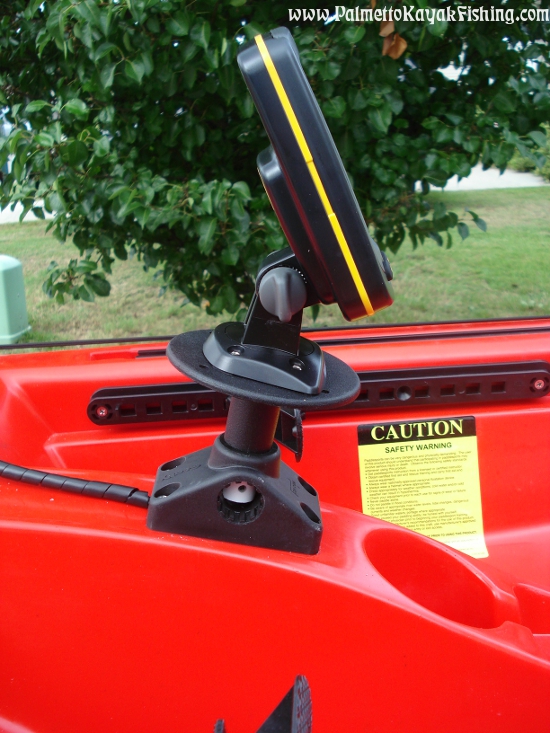
I chose a basic waterproof fish finder – Humminbird’s Piranhamax 170 – that can be purchased for around $100. What I like about the Piranhamax 170 is that it is simple, accurate, boasts a digital temperature gauge and has a vibrant LED backlight for low light/no light conditions. It utilizes dual beam sonar (60°& 20°) which produces great results in both the shallow and deep water that I regularly fish. My only gripe is that I wish the unit had a digital voltage display like my old Eagle Cuda.
Since I already had a few extra Scotty 241 bases left over, I decided to save some money and build a mounting post with some items I had laying around in the garage. The main components total around $3-$4 and include:
1 - 4.00" Round Plastic Electrical Box Cover – Lowes Item # 81585 (LINK)
1 - 1½” long, ¼’ diameter bolts (or something similar)
1 – Stop Nut to fit bolt
1 – ½” Schedule 40 PVC Coupling – Lowes Item # 23849 (LINK)
1 – ½” Schedule 40 PVC Pressure Plug - Lowes Item # 22679 (LINK)
1 length of schedule 40 PVC cut to 2-3/8”
Fish Finder Mounting Base
Drill a hole in the center of the round electrical box cover and one through the center of the PVC pressure plug. Slide the bolt and nut into place as pictured and tighten up the whole assemble. Using PVC glue, attach the PVC coupling to the end of the PVC pressure plug. Take the 2-3/8” section of PVC and glue it inside the coupling. The exposed length of ½” PVC pipe is what will hold the unit firmly inside the standard Scotty mount. I drilled an additional hole at the bottom of the PVC so that when the unit is inside the Scotty mount, I can slide a bolt or pin through it for added security.
(***To dress it up a little, I sprayed it with a can of “Truck Bed Liner” left over from another project. If you go this route, be sure to mask off the bottom section of exposed PVC so that it will still be able to fit inside the Scotty Mount.)
I used the stainless steel screws that came with the fish finder to mount it to the plate. Once in position, I smoothed off the points of screws so that they were flush with the round plate using a Dremel tool.
Installing the Unit
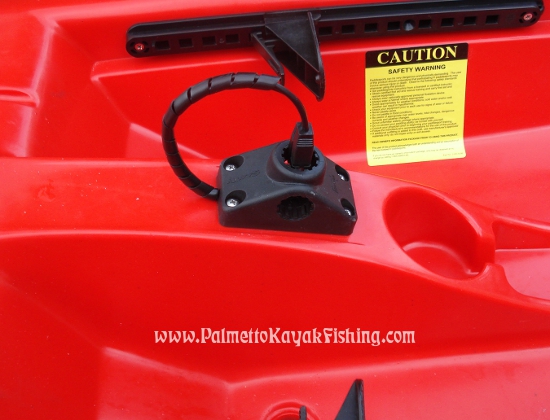
I used the Dremel tool to bore out the underside of the Scotty mount to make more space for the transducer and power cords (see picture). Once this was completed, I placed the Scotty mount in position on the deck and drilled out 4 holes for the mounting screws. Next, I selected a drill bit that would create a hole large enough in the center area of the 4 mounting screw holes to allow the wires and plugs to pass through the kayak deck.
Using a rubber stopper - 3/4 x 9/16 x 1 Lowes Item # 139548 (LINK) – I drilled, shaped and cut the rubber as pictured. Again, there are commercially available marine accessories that accomplish the same thing, but I had an extra rubber stopper from the transducer arm install so I decided to put it to use.
Leave 12” of slack in both wires from the rubber stopper to the end of the wire plugs. Remove the rubber stopper while holding the wires in position to maintain the 12” of slack. Generously coat the entire rubber stopper and both wires with Marine Goop. Push everything back into position and add a small amount of goop to the 4 mounting holes as pictured. Carefully mount the Scotty mount to the deck ensuring that there is enough space for the wires to pass through without any pinching.
 |
| Click for Transducer Arm DIY instructions |
 |
| Click for Transducer Arm DIY instructions |
The next blog post will feature a DIY removable battery box setup that I use to power this unit. Have fun out there! - Paul


