Showing posts with label Gear Review. Show all posts

Tuesday, November 8, 2011

Cold Weather Kayak Fishing Gear on a Budget

 
Saluda River trout fishing last winter

It was just two weeks ago that I was kayak fishing on the Congaree River in Columbia, occasionally wading through the shallow sections in the 68 degree water.  Dressed in my normal summer fishing attire of shorts and Tevas, I soaked up what would become one of the last warm weather days of the season.    While the river was a little on the chilly side, the combination of the water and air temperatures was well above the 120 degree mark where things start to get dicey.  It is an easy calculation– simply add the water temperature to the air temperature.  If this number dips below 120 degrees, the right combination of clothes becomes critical. 
 
I'll assume every kayak angler reading this uses a PFD.  While I recommend you wear it all the time, without fail, keep it on during the winter season.  I don't think I need to elaborate on why this is crucial in cold water.  

For a base layer, I prefer light polyester, capilene or polypropylene long john-style pants.  I stay away from standard long johns that tend to be on the bulky side.  I use the Terramar brand of thermal base layer pants that sell for $6.99 at Rugged Warehouse in Columbia.  They are constructed of high quality 100% polypropylene and have a nice thin design.   Whatever you end up purchasing, be sure to read the label and don't buy blends that contain cotton.  

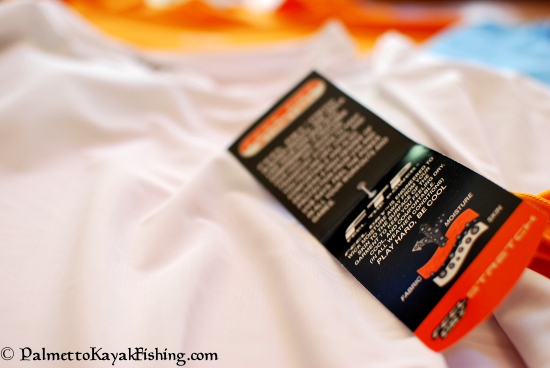
Marmot wool/fleece hat - $9, FTP 80/20 polyester/spandex compression shirt - $5, Terramar 100% poylpro pants - $7

I look for the same materials in the long sleeve shirts I use for my torso base layer.  Many folks may already own these style shirts for summertime fishing to block UV rays and stay cool.  The purpose of this layer is to wick sweat away from the skin.  Again, outfitters like Rugged Warehouse offer these shirts from a variety of different manufacturers at deep discounts.  While RW's inventory changes all the time, I can usually find what I need.  I picked up a few extra FTP brand long sleeve compression shirts (80% polyester, 20% spandex) this past weekend for just $4.99 each.  

Source: Dick's Sporting Goods - $59.99 Caddis Neoprene Waders

Caddis Neoprene Chest Waders are available online from Dicks Sporting Goods and make up the key component of my outerwear.    At around $60, the price is right and they come in tall sizes as well.  I have been using these same waders for over 2 years now.  They are durable and quite warm thanks to the 3.5-mm thick neoprene.   Although the product picture can be deceiving, these waders are fully footed, waterproof and sealed.   Purchase the most inexpensive pair of wading shoes you can find.  After all, you'll be sitting down in the kayak and secure footing on riverbed rocks isn't exactly an issue.

I wear an inexpensive ($20) but warm fleece jacket and keep a spare in a waterproof bag in my hatch.  To keep the wind and rain at bay, buy a quality 100% waterproof and breathable unlined jacket shell.  Outfitters like Sierra Trading Post (take advantage of the coupon codes that are always available) and even Eddie Bauer will offer Gore-Tex like material at low cost.  Watch for seasonal sales especially through Eddie Bauer.  I use one of EB's "WeatherEdge" jackets for kayak fishing and paid less than $30 for the waterproof/breathable shell that has held up and performed as well as Gore-Tex.   

Eddie Bauer WeatherEdge waterproof/breathable shell - $30, spring clearance sale


Lastly, make sure you have a quality wool or fleece hat.  The great thing about both of these materials is that they insulate even if they get wet.   I wear a Marmot wool/fleece blend hat that I picked up at a clothing discount store last year for $9.  When it comes to keeping hands warm, I have found that waterproof Neoprene gloves work the best for me.  They don't absorb water and insulate well.   I've been using the same pair of Remington neoprene gloves for over 12 years now and they are still going strong.  If you need extra layers, stick to the basics I have pointed out here.  I'll sometimes add an Adidas ClimaLite pullover (clearance section, T.J. Maxx $9) into the mix if I need it.  A number of lightweight layers that can be peeled off or put back on as conditions change make all the difference in the world when managing comfort.


This guide should serve as a starting point, simply adjust layers according to your specific needs.  Just remember, dress and prepare as though you plan on taking a swim and be sure you are skilled enough to get back into your kayak in case things go south.  I have practiced deep water kayak reentry in the summer months wearing waders and a base layer just to make sure I could succeed without issue.  If you have any doubt in your abilities, wait until it warms up.  

Another good idea is to throw a backup set of clothes in a dry bag so that you are prepared for the worst.  When I head out on the Chesapeake Bay, things become a little more extreme than the more urban kayak fishing I do in Columbia.  In addition to the extra clothes, I toss in a couple of Pop Tarts, a waterproof/windproof jet style butane lighter, a roll of toilet paper and a tube of alcohol-based hand sanitizer into the dry bag.  The last three items will get a fire started quickly even in the most adverse conditions.

Friday, August 5, 2011

2012 Wilderness Systems Ride 135 Review


The redesigned 2012 Wilderness Systems Ride 135 delivers a remarkable fishing platform in a well thought out package.  Mine came in on Tuesday from Austin Canoe & Kayak and I spent the afternoon rigging it up for fishing.  I added a few basic items like an anchor trolley, Scotty mount rod holders, fish finder, custom transducer arm and some homemade Slidetrax accessory plates.  Rigging a new kayak from the ground up is one of my favorite hobbies and each time I seem to find a better way to do a few things. 


The center hatch was damaged during shipping, but Austin Canoe & Kayak took care of it immediately.  Thirty minutes after the call, I had a FedEx tracking number and the new hatch was on its way.  The sense of urgency that that the ACK customer service reps took with this issue was impeccable.  Accidents happen - it’s all about how a company responds to a problem.  I’ll be the first to say that ACK embodies true customer service.                     

Other companies/industries in our weak economy should definitely take note.  In the meantime, I “borrowed” the center hatch from my girlfriend’s Tarpon 140 and replaced my broken unit with it until the new one is delivered.  


On Wednesday I loaded up the Ride and took it out to a local pond for the first test paddle.  I was amazed - literally amazed by how well this kayak performed.  I’m 6’8”, 240lbs and not only is the 2012 Ride 135 incredibly comfortable, there is room to spare.  It is dry, gets up to speed quite easily and tracks well.  For its large stature, it is surprisingly easy to paddle and control.  So well in fact, that I don’t think it should be categorized as just another “big guy’s kayak”.  I have no doubt that my much smaller girlfriend could paddle this yak with ease.  In addition, the fly fishing crowd is probably going to appreciate a lot of the styling cues that this yak has to offer.


Granted, the new Ride 135 is a little on the heavy side but so are the majority of other fishing kayaks in this class.   When loading the kayak on the roof rack or carting it down to the water using my Bulletproof DIY Cart, I don’t notice any significant weight difference from that of my previous big man’s fishing kayak that the Ride 135 is replacing.  


The seating system coupled with the floor layout is genius.  In other kayaks I have owned, I run into a common problem - there never seems to be enough leg room for me from the seat to the foot pegs.  I have historically had to modify the design of the foot pegs to make my legs more comfortable, but the Ride’s configuration worked perfectly right out of the box.  


The amount of flat floor space on the deck of the new Ride 135 just begs the kayak angler to stand up and fish.   Combine this feature with the super stable pontoon-style hull design and a whole new standard in fishing kayaks is born.  Even with the wind blowing at a good clip, I wasn’t even remotely concerned about stability while standing for the first time.  Transitioning from a standing position back into the seat – a topic that is rarely discussed yet is equally as important- was effortless.


Another nice touch is the sliding seat system.  The robust seat is very comfortable and has multiple adjustment points that allow for a tailored fit.  Back support is also more than sufficient.  Changing the position of the seat works much like a manually adjustable seat in a car and is surprisingly smooth.  This arrangement allows the paddler to adjust his weight over the deck of the kayak, giving the user control over how the yak sits in the water.  I tend to carry quite a bit of gear in my kayak crate so having this option will be a welcomed change when I am out fishing.   It is also worthy to note that the seat can be removed completely which opens up a lot of doors for custom configurations.  Given the stability of this kayak, an aftermarket “high seat” would be very feasible. 


So in a nutshell, I couldn’t be more pleased with the new 2012 Ride 135.  A lot more details and how-to rigging ideas coming soon!  - Paul


          Thanks for reading and be sure to visit our online store at www.PalmettoKayakFishing.com


                                              2012 Wilderness Systems Ride 135 Pictures
                                                             2012 Ride 135 Rigged


My custom built transducer mounting system - more on this later!

My custom built transducer mounting system - more on this later!

My custom built transducer mounting system - more on this later!

My custom built transducer mounting system - more on this later!


Wednesday, July 20, 2011

Stake Out Poles


“You plan on doing some spear fishing?”  I can’t tell you how many times I have heard some variation of this line followed by a chuckle or two when I’m launching my fishing kayak in a public area in the Midlands of South Carolina.  What onlookers are referring to is my stake out pole or anchor pin.  While quite common in coastal areas, SOPs aren’t exactly popular around many of the lakes and rivers that I routinely fish.  My SOP of choice (surprise, surprise) is the PKF 5’ solid fiberglass shaft option with T -handle and 550 paracord leash.  Instead of having to toss out an anchor, the SOP allows me to quickly and quietly pin my kayak in shallow water.  This is extremely useful in the wind or current.  The SOP also removes the hassle of having to dodge the anchor line while fighting a hooked up fish.


SOPs can be used in a variety of ways.  I deploy my SOP through one of the scupper holes in my sit-on-top kayak, slide it through the ring on my anchor trolley or use the supplied paracord leash to clip it to an eyelet on the deck.  


The conditions usually dictate which method I chose.   In choppy water, I use the 4’ leash because it allows me to put some distance between my kayak and the pole.  This way I am not banging up against the SOP every time the wind blows or a wave rolls by.  In rivers, I slide the SOP through one of the scuppers and wedge it into the river floor or between rocks.  This method works exceedingly well in light current.  If I am in a back cove, I slide the SOP through the ring in my anchor trolley.  With a gently pull of the anchor trolley rope I can reposition the direction of my kayak with ease.  No matter what method is used, having a leash allows the SOP to remain secured to the kayak at all times.


I’ve seen (and built) SOP’s constructed out of just about everything from PVC to wooden broom sticks, metal conduit to bamboo….the list goes on and on.  After all, the basic “technology” isn’t exactly advanced – for all intensive purposes a SOP is essentially a pointed pole.  But for those of us that take kayak fishing a little more seriously, fiberglass construction coupled with a few basic accessories can take the shallow water fishing experience to the next level.


Why fiberglass?  It is durable* and is at home in a marine environment.  Rigidity plays a very important role in SOP construction as well.  There is a “sweet spot” between rigidity and flexibility for SOP construction.  Like shocks on a car, a SOP that has some flex absorbs most of the impact from rough water, wind or current.  Not only does the kayaker feel less jolt, the slight flex keeps the SOP firmly planted. 


So whether you build your own SOP or purchase a commercially available one, this tool can greatly improve your kayak fishing experience in shallow water.  If nothing else, it is a great conversation piece at the boat landing - especially if you tell the locals you are still after that white whale.

-Paul


* PKF’s Fiberglass Shaft SOPs are also coated in a special smooth outer sheath that won’t crack, yellow or otherwise deteriorate from water or UV exposure.  For more information click here to visit PKF’s online store


Wednesday, June 15, 2011

Malone Seawing Review

Until recently only two companies came to mind for quality kayak roof racks and accessories: Thule and Yakima.  Both offer outstanding products but I have found one more worthy contender to add to the list– Malone Auto Racks


I recently purchased a set of Malone Seawing kayak saddles from Austin Canoe & Kayak in Texas for my Thule Xsporter rack.  ACK by the way has exceptional prices, fast shipping and world class customer service.  I can’t recommend them enough.  Sign up for their newsletter and “like” their Facebook page to receive exceptional coupon codes you can use on the majority of the items on their site. 

Installation of the Seawings is straightforward.  Malone includes all the required hardware to mount the kayak saddle to just about any size and shaped crossbar.  For my application on the Xsporter, I used the longer of the two sets of supplied mounting bolts.  Five minutes of work and the cradles were securely fitted to my rack using the hand tightened knob bolts.


I elected to add stop nuts to each of the mounting bolts to make it harder for someone to just unscrew the bolts by hand and walk away with the racks.  At .62 cents for a package of 4 stop nuts, this was a no-brainer decision that adds a little more security.


Loading and unloading a kayak on this rack is easy if you use a little common sense.  The top of the rack that contacts the hull of the kayak is covered in a high density rubber that is designed to grip the kayak during transport.   


To make it easier to load and unload the kayaks, I utilize a soft padded fold-up stadium seat and place it over the back portion of the rack.  


The stadium seat provides a slick platform that makes sliding the kayak into position on the rack easily achievable.   I rest the nose of the kayak on the pad-covered Seawing and walk to the back of the yak up onto the rack. 


This method alleviates any real heavy lifting at all.  It couldn’t be simpler.  Once in position it is easy to strap down the kayak with the supplied cinch straps and front/rear tethering lines.  I pre-cut the tethering lines and added a couple of clips so that I don’t have any knots to tie once the kayak is in position.  This method saves a lot of time.

The Seawings work flawlessly under city and highway driving and I have yet to experience any issues with the saddles even at high speeds.  I do add an extra lashing strap that fastens over the kayak and directly to the Thule Xsporter Rack just for added security, but it probably isn’t really needed.   Within one week of using my first set of Seawings I ordered a second pair for my girlfriend’s kayak.  Malone’s Seawings are a great value and are very easy to install and use. - Paul