
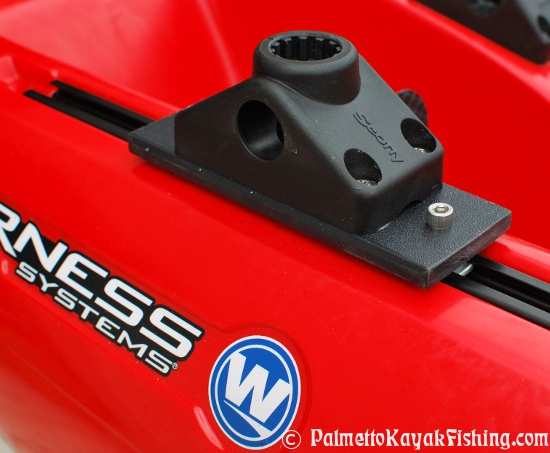
Wilderness Systems’ “SlideTrax”, available on many newer-model fishing kayaks, opens up an assortment of accessory mounting options for the kayak angler. If you are not familiar with the SlideTrax system, it is basically a metal rail that is molded into the deck of many WS kayaks and allows users to have a movable (and removable) mounting point for all kinds of accessories. After dropping a significant amount of cash on a new kayak, many paddlers don’t want to spend a lot of money on accessories. The cost of commercially available SlideTrax bolts, nuts and platforms can soar quickly. So to stay true with my DIY roots, I set out to fabricate my own setup.
When I first purchased Rachael’s Tarpon 140 with the SlideTrax system a few years back, I opted for the popular Toilet-to-Floor bolts method (Lowe's part number PP23517) to add accessories like Scotty rod holders.
One $2 package of brass bolts cut down to size and a couple of wing nuts are the main components. This option gets the job done and requires very few tools other than a hacksaw to cut the bolt down to size. The bolt has a rounded rectangular head that fits into the SlideTrax, leaving the threads pointing up through the holes in the cutting board. The only downside is that the toilet-to-floor bolt may spin ever so slightly in the track when tightening or loosening up the wing nut.
This time around I wanted to fabricate something that closer resembled the OEM hardware for the 2012 Ride 135 SlideTrax. OEM brass SlideTrax nuts are available online but the price is around $12 before shipping for a package of 4 nuts.
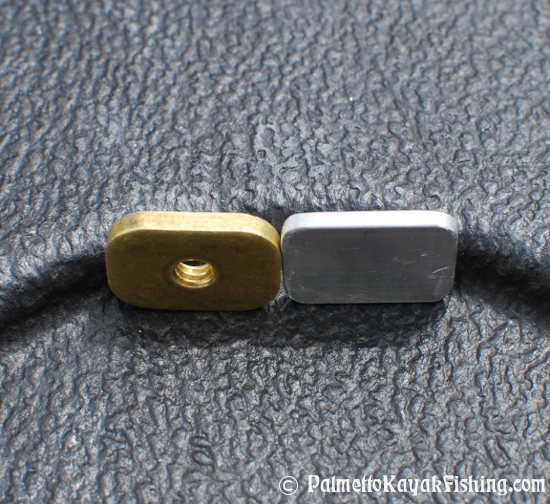
Using one of the OEM SlideTrax nuts from the Tarpon as a guide, I cut down blanks out of the leftover 1/8 x 3/4 x 3 aluminum flat stock (Lowe's part number 24403) from the rear transducer arm build. I rounded off the edges of the aluminum with a sander to match the curvature of the original hardware.
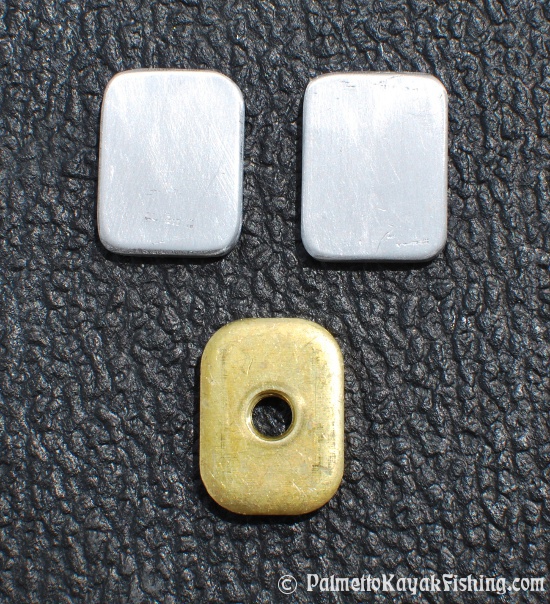
A 1/4"-20NC Tap and #7 Drill set that costs around $6 (Lowes Item #: 232572 or Home Depot Item # 1765538) produced the threads in the aluminum. I used a center punch in the middle of the aluminum blanks so my drill bit would stay in place.

Next, I put the hand drill on the slowest setting, using the tap bit to produce the threads. To make the accessory bases, I cut and shaped pieces of black cutting board (again, left over from the Transducer arm build).

One tip to make the cut edges of the board look super clean is to first use sandpaper to smooth the edges down. Follow up by using fine grade steel wool. When enough pressure is applied, the steel wool will make the edges “shine” and look like a custom molded piece of plastic instead of a chopped cutting board. This step really makes the accessory plate look very clean.


Mounting Hardware: (Home Depot is significantly cheaper than Lowe' on these items - for this build, I recommend buying all the components at HD vs. Lowe's if you want to make one stop.)
1 – package of Stainless Steel 1/4 in.-20 x 3/4 in. Button Head Socket Cap Screw (Home Depot part # 71918) includes 2 bolts
2 – packages of Nylon Spacers: .358 in. x 13/64 in. x 3/4 in. (Home Depot part # 87348)
Various SS bolts or screws for mounting accessories to the cutting board mounting base.

The nylon spacers were epoxied to the bottom of the accessory plate. This gives a smooth, raised surface for the accessory plate to glide on top of the SlideTrax. I keep an allen wrench in a pocket in my PDF in case I want to adjust the placement of the accessory plates or remove them all together.
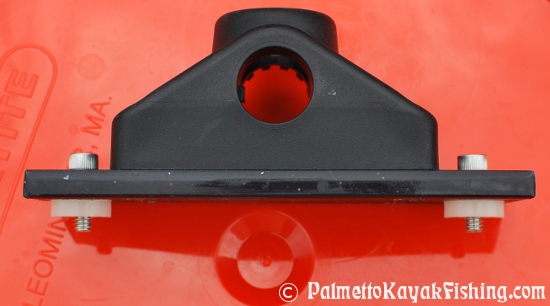


The aluminum plates are very strong and lightweight. The tapped threads have not deteriorated in the least bit over the last month of use and I am confident that this setup is just as secure as the commercially available options.


