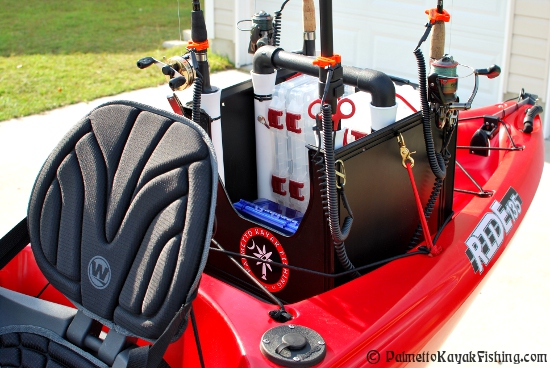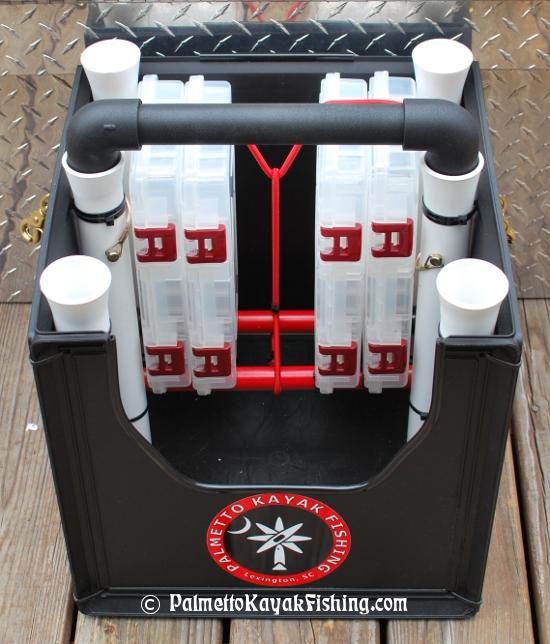
The kayak crate. It is probably one of the most coveted pieces of equipment a kayak fisherman can own and for good reason. While most anglers use a standard plastic milk crate, I tend to make mine out of inexpensive and readily available store-bought containers. When I first got into the sport, I used file crates for storage. The problem with these is that the plastic is thin and the crate tends to flex. Zip tie a couple of rod holders to these units and over a short period of time, the plastic crate will deform. After designing my first DIY LARGE KAYAK CRATE, I found that there are some great, heavy duty containers just waiting to be modified for this application.
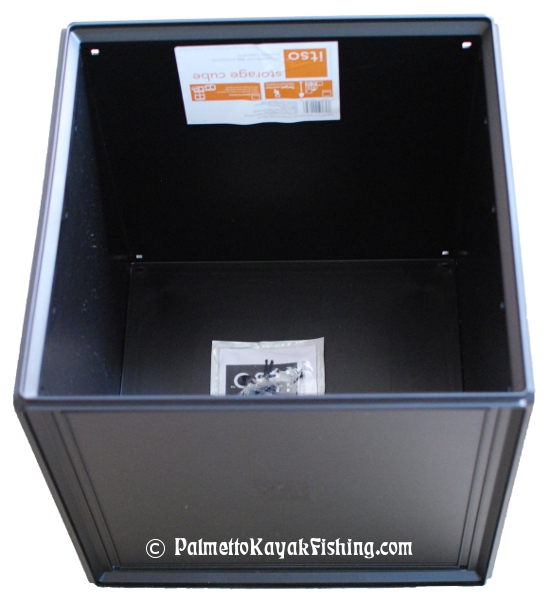

The first step is to cut six 15.5" segments of 1.25" diameter PVC for rod holders. Although I don't usually carry 6 rods with me at one time, I use the holders for my DIY Telescoping Camera Pole for the GoPro HD and other accessories. I also built a removable carrying handle that utilizes the center rod holders and allows for one-handed portability - more on that later.

Once the PVC segments are cut, use Brillo soap pads and some water to remove the lettering from the PVC. My dad taught me this trick about 17 years ago when he would make furniture-grade rod holders out of various hardwoods and use the cleaned up PVC for the inserts.

If you don't own a heat gun or are not comfortable using one, simply sand the inside edge of the PVC pipes so that they don't bite into the rod handles. If you decide to go the heat gun route, do this OUTSIDE and wear proper safety gear including a respirator mask, eye protection and thick leather gloves.

I like to keep the heat gun stationary and rotate the PVC by hand as this method ensures even heating. I use a Modelo bottle for this next step for a handful of reasons. Most importantly, the glass is thick which is crucial for proper safety. I also really like the beer and the shape of the neck makes a perfect and uniform mold for the PVC every time.


Once the PVC is up to temperature, slide it over the Modello bottle until it stops on the notch below the neck as pictured. The PVC should easily slide into place. If it doesn't expand smoothly with little pressure, it is not hot enough. Leave it on the bottle for a few seconds and slide it back off. Repeat this sliding-on-and-off process as it cools. DO NOT leave the PVC on the bottle for an extended period of time. As the PVC cools it shrinks. If it is left on the bottle, this could lead to obvious safety issues. I keep a cold bucket of water next to me to dip the warm molded PVC (of course, without the bottle attached) in order to speed up the cooling process and set the PVC to shape.
Attach the PVC rod holders to the inside of the crate using large zip ties as depicted in the photos. For the middle rod holders that aren't on a corner, I ran two zip ties through the top hole and attached a brass claw style clip to serve as an anchoring point when the crate is used in the tankwell of the kayak (see photo).

One extra step I took was to drill a hole in the bottom of each PVC pipe and 2 more holes, side by side, in the bottom of the crate. One zip tie attached through the floor of the crate and through the PVC gives the rod holder that much more stability and keeps it from twisting or pulling out of the crate.
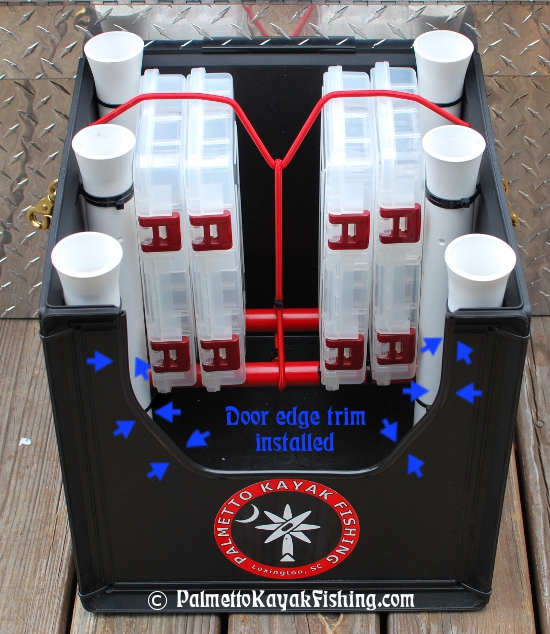
Using masking tape, mark out a section on the front of the crate that will be cut out. This "door" makes it very easy to access items in the crate. Use a hacksaw blade to carefully cut out the pattern. I installed Cowles Products - Door Edge Trim (Part #T3802 - O'Reilly Auto Parts LINK) to cover the rough edges and to dress the crate up a bit. This trim has strong adhesive housed inside the U-channel and only costs a couple of bucks.
You could stop here and have a really nice setup. I decided to go further with it and make things a little more organized. I took some scrap 7/8" fiberglass rods (1" PVC could be substituted), added rubber chair tip protectors to the ends and zip tied them to the PVC rod holders in the back of the crate as pictured. This provides a shelf for my Plano boxes and makes them easy to reach.
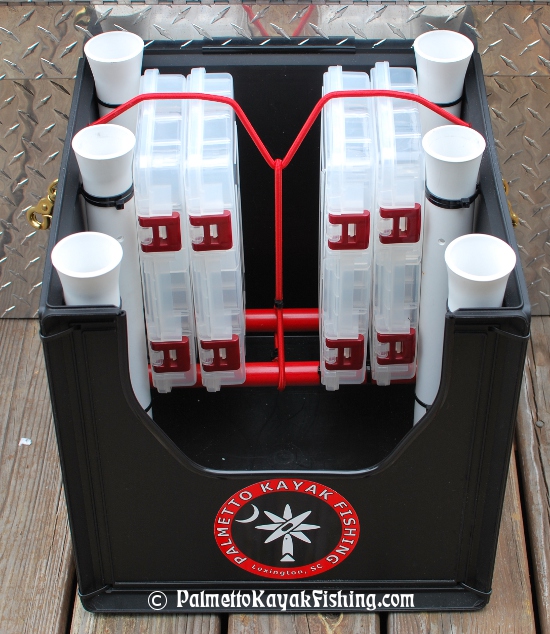

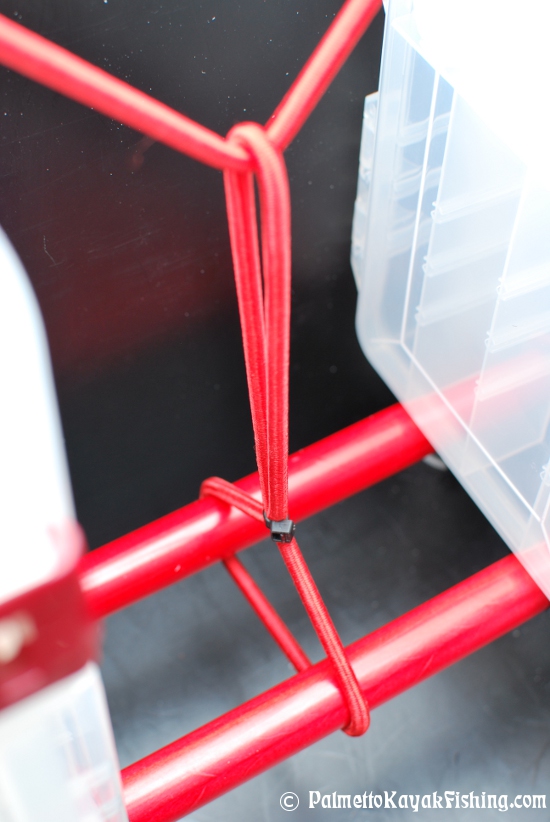

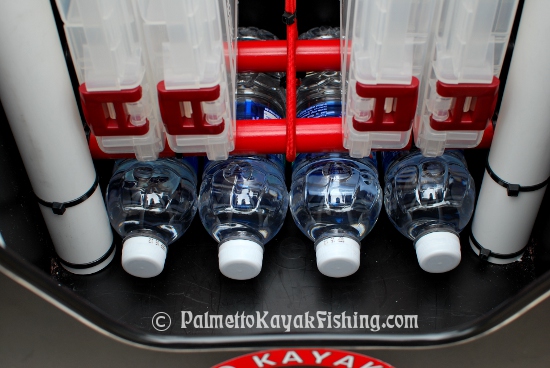
I ran a section of bungee cord through 2 of the existing holes in the top of the cube and knotted the ends. I made another loop of bungee cord and passed it over the horizontal bungee and around the two fiberglass rod supports (see photo). The tension that the combination of these two bungees creates holds the boxes in place, whether it be as many as 5 boxes or as few as 2. I left enough room under the bottom of the shelf to store my water bottles. There is still a lot of storage space left over in the front of the cube for other items.
Lastly, I built a handle out of a 10.5" length of 1" diameter PVC, two 6" sections of 1" diameter PVC and two 90 degree couplings. I can't tell you how nice it is to be able to throw 3 or 4 rods and my camera in my loaded crate and carry it one handed like a suitcase.


The top portion of the handle was sprayed with truck bed liner. I drilled two holes at an angle through both the rod holders and the vertical legs of the handle for an attachment point. PTO pins, available in this well-priced assortment available at Harbor Freight, make quick work of attaching and detaching the handle.
Enjoy! - Paul
MORE PICTURES BELOW